 QQ咨询
QQ咨询 阿里旺旺
阿里旺旺 #skype#
AWS ElastiCache 配置教程
使用 AWS 管理控制台创建 Redis 缓存集群
创建子网组
在 Amazon VPC 中创建集群,则您必须指定缓存子网组。ElastiCache 使用该缓存子网组选择一个子网和此子网内的 IP 地址,以便与您的缓存节点相关。

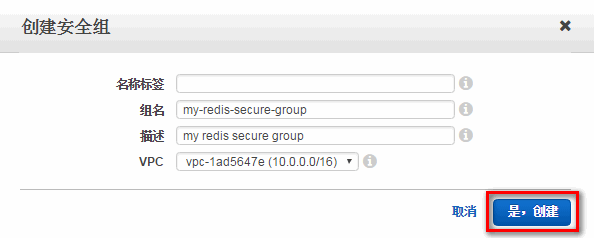
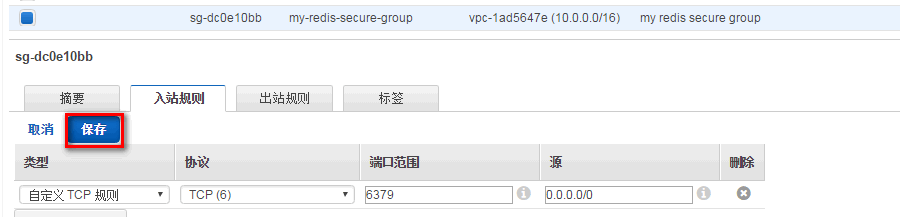
创建安全组
使用 Amazon VPC 安全组控制对缓存集群的访问。
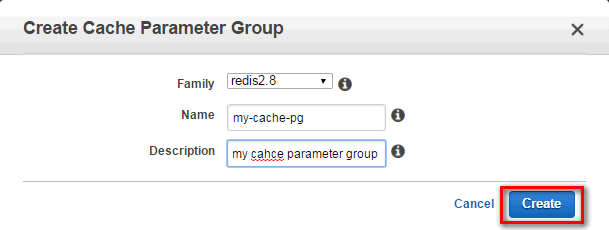
创建参数组
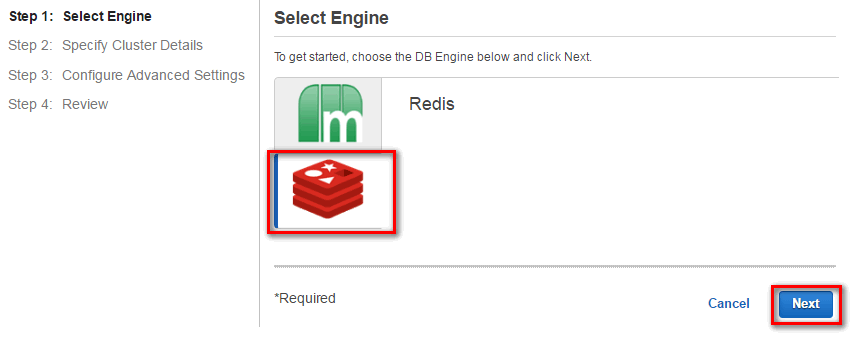
使用 AWS 管理控制台创建 Redis 缓存集群
选择 Redis 引擎
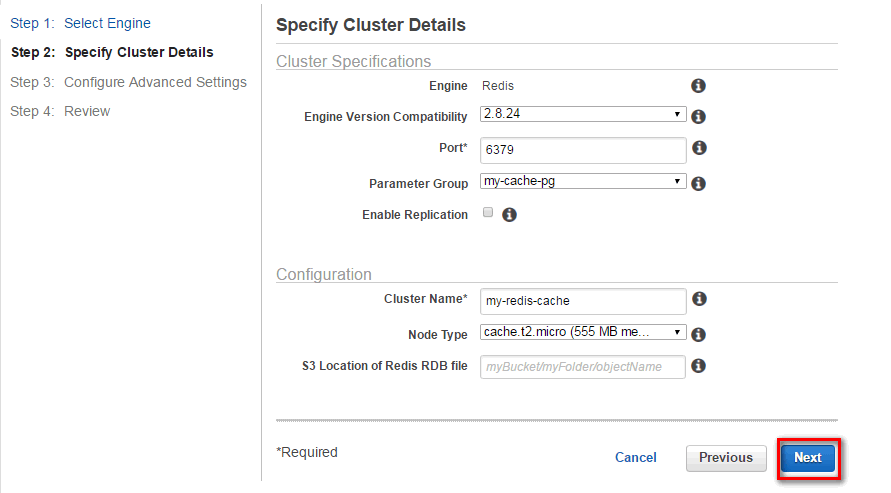
指定集群详细信息
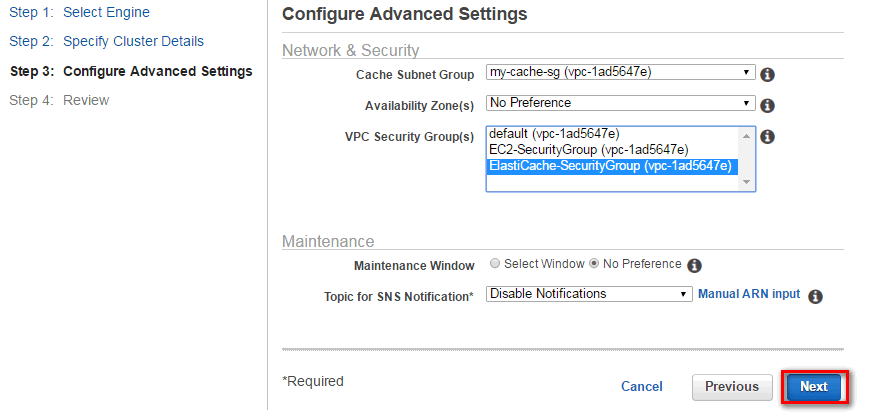
配置高级设置
查看和启动

修改 ElastiCache 缓存集群
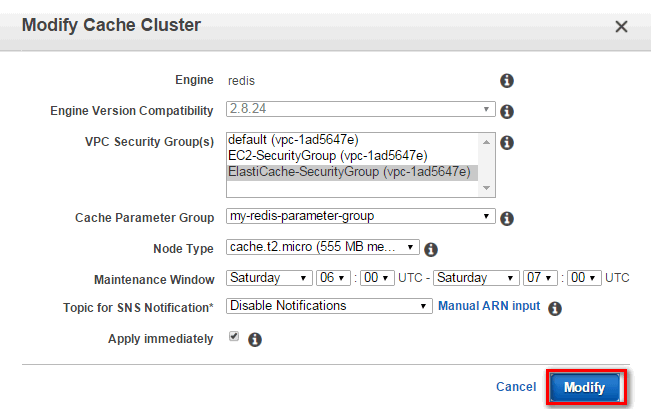
使用 AWS CLI 修改缓存集群
$ aws elasticache modify-cache-cluster \
    --cache-cluster-id myCluster \
    --preferred-maintenance-window sun:23:00-mon:02:00
连接到集群节点
使用AWS管理控制台查找终端节点
单击集群具有的节点数


使用AWS CLI查找终端节点
$ aws elasticache describe-cache-clusters --cache-cluster-id my-cache --show-cache-node-info

连接到 Redis 集群
使用 redis-cli 连接到 Redis 集群
安装gcc
$ sudo yum install gcc
下载编译redis-cli实用工具
$ wget http://download.redis.io/redis-stable.tar.gz
$ tar xvzf redis-stable.tar.gz
$ cd redis-stable
$ make && make install
连接到redis集群
$ redis-cli -h my-cache.fafvgr.0001.usw2.cache.amazonaws.com -p 6379
您现已连接至集群并且可以运行 Redis 命令。以下是示例。

> set a "hello"     // Set key "a" with a string value and no expiration
OK
> get a              // Get value for key "a"
"hello"
> get b              // Get value for key "b" results in miss
(nil)
> quit               // Exit from redis-cli
使用 AWS CLI 创建缓存子网组
$ aws elasticache create-cache-subnet-group \
    --cache-subnet-group-name mycachesubnetgroup \
    --cache-subnet-group-description "Testing" \
    --subnet-ids subnet-53df9c3a